
Laser Maker Studio
User Guide
Make G-code for your hobby laser engraver and cutter, check it, and run it on your laser.

For Laser Maker Studio on the website. October 2026.
Contents
- Getting going
- What it is, and getting started
- Safety first
- Find your settings: the test grid
- Making G-code
- Photo engraving
- Cutting and scoring a drawing
- The laser designer: fill, line and cut layers
- The box maker
- Your machine, and framing the job
- The simulator
- Running it on your laser
- Send to machine: connect, set up, the dot
- The job, framing and burning
- Coming next
- When something is wrong
- Problems and fixes
- Quick reference
1What it is, and getting started
Laser Maker Studio is a set of tools for hobby laser engravers and cutters that run GRBL (most diode lasers with an open frame, and many others). It makes the G-code:
- Photo engraving: a picture turned into the sweeping lines a laser burns.
- The laser designer: draw, type or import, and give each colour its job: fill, line or cut.
- The box maker: finger-jointed boxes from a size and a sheet thickness.
- Cutting and scoring: a drawing (SVG), or a picture traced to outlines, cut out or marked, with the right job for each colour.
- The test grid: a chart of squares that tells you what power and speed your material wants.
- The simulator: plays any GRBL file back move by move, so you see what the laser will do first.
And it runs it: Send to machine connects to your laser over USB, from the browser, and burns the job.
Everything runs on your own computer. Your pictures and drawings are only sent to the website when you save a job to your account.
Your account and what is free
- Sign in with your free 3d-lithophane.com account.
- Free: 10 free downloads a month (shared with the rest of the site) and 2 jobs a day on your live laser. Setting a job up, the previews, the test grid, the simulators, jogging and the dot are never counted.
- Unlock Laser Maker Studio once, for life, for no limits. Launch price $24.97 for the first 7 days after the release, then $39. It is bought on its own: it is not part of the Supporter plans.
The usual order
- New machine or new material? Burn a test grid first and read your power and speed off it.
- Make the G-code: Photo engraving for a picture, Cutting for a drawing.
- Press Watch it run to see it in the simulator.
- Press Send to machine: connect, set the zero with the dot, frame it on the material, and burn it. (Or open the file in your own sender, such as LightBurn or LaserGRBL.)
Your machines and materials
Photo engraving, Cutting and the test grid have a Saved machine list, and Photo engraving a Saved material list.
- Save this machine keeps the bed size, the corner the zero is in, full power and the travel speed under a name. The machine you used last loads itself next time.
- Save this material keeps a power and a speed that worked. The test grid saves one too, straight from the square you liked.
- They are kept on your account, so the website and the app show the same lists, on any computer. What you saved in a browser before this is brought onto your account the first time you open one of these pages signed in.
Saving a job to burn again
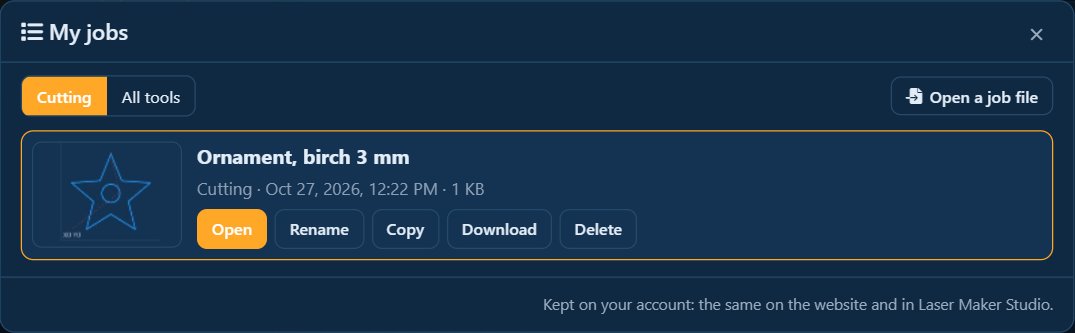
Photo engraving, Cutting, the test grid, the laser designer and the box maker have a bar at the top with Save job and My jobs. A saved job keeps your picture or drawing and every setting, so you can open it again, change something and burn it again.
- Save job asks for a name the first time. After that it saves over the same job; Save as new keeps the old one and makes another.
- My jobs lists them with a small picture: this tool's, or all tools. Open, Rename, Copy and Delete are there. Opening a job of another tool takes you to that tool.
- Download saves a job as a
.laserjobfile; Open a job file opens it again, also without the internet. - Jobs are kept on your account, the same on the website and in the app. A very big photo is made smaller when it is saved. The photo you draw over in the designer is never saved.
2Safety first
- Never leave it running alone. Wood and card can catch fire, most of all when cutting. Keep something to put a fire out within reach.
- Smoke: work with air flowing out of the room, or with an enclosure and a fan.
- Never laser PVC, vinyl or anything chlorinated. It gives off hydrochloric acid, which ruins the machine and harms you. If you do not know what a plastic is, do not cut it.
- Try it at low power on scrap first. There is no table of "correct" settings in these tools on purpose: what marks oak does nothing to birch ply and cuts through card. That is what the test grid is for.
- Frame every job before it burns: it is the only check that the work is really over your material.
3Find your settings: the test grid
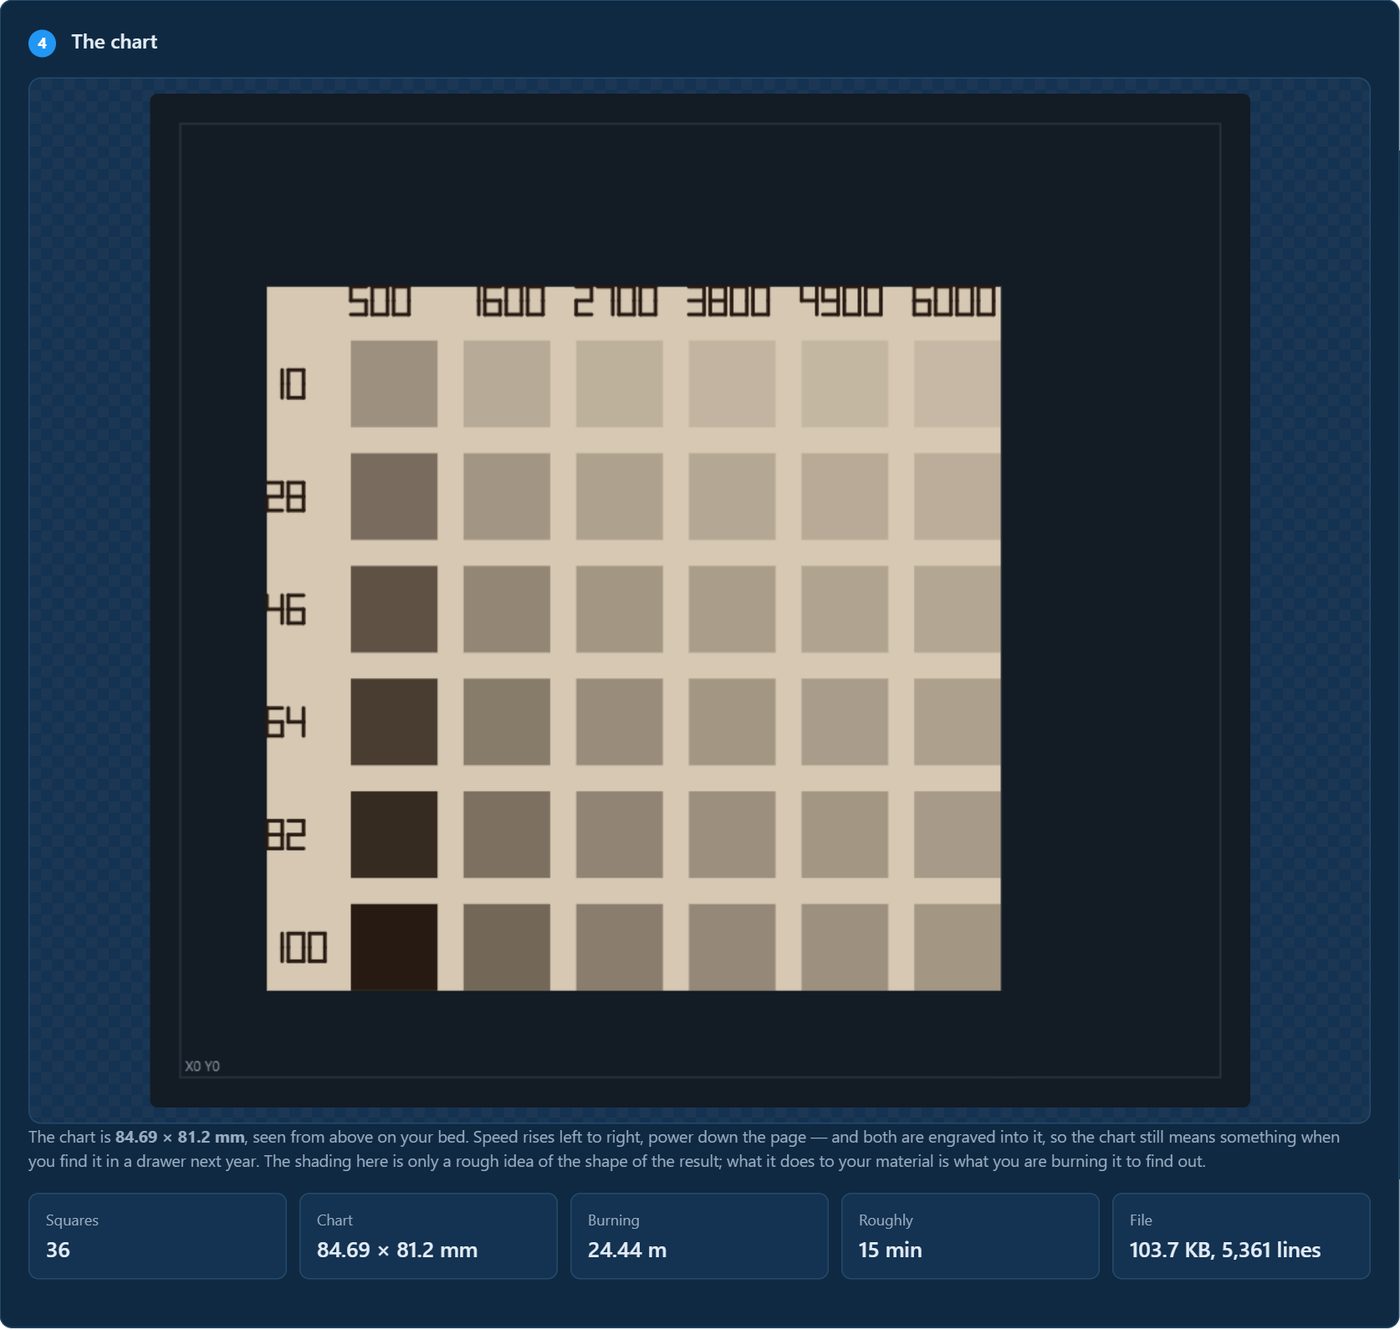
A chart of squares, each burned at a different power and speed. Burn it on the material you want to use and read the settings off the square you like best. Start here whenever the machine or the material is new to you.
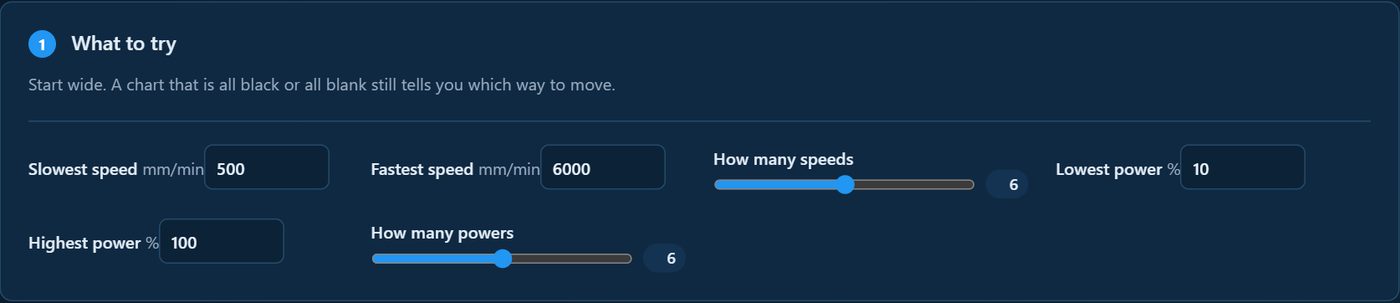
- What to try: the slowest and fastest speed, the lowest and highest power, and how many of each. Start wide: a chart that is all black or all blank still tells you which way to move.
- The squares: their size, the gap between them, and the fill spacing. Use the line spacing you would engrave a picture at, or the squares will not tell you about a picture.
- Your machine: see chapter 8. The chart uses
M3, constant power, so each square really is the power written next to it. - Download it and burn it.
- Save what worked: give the material a name and the power, speed and line spacing you chose. The engraving page offers it next time.
Making G-code
4Photo engraving
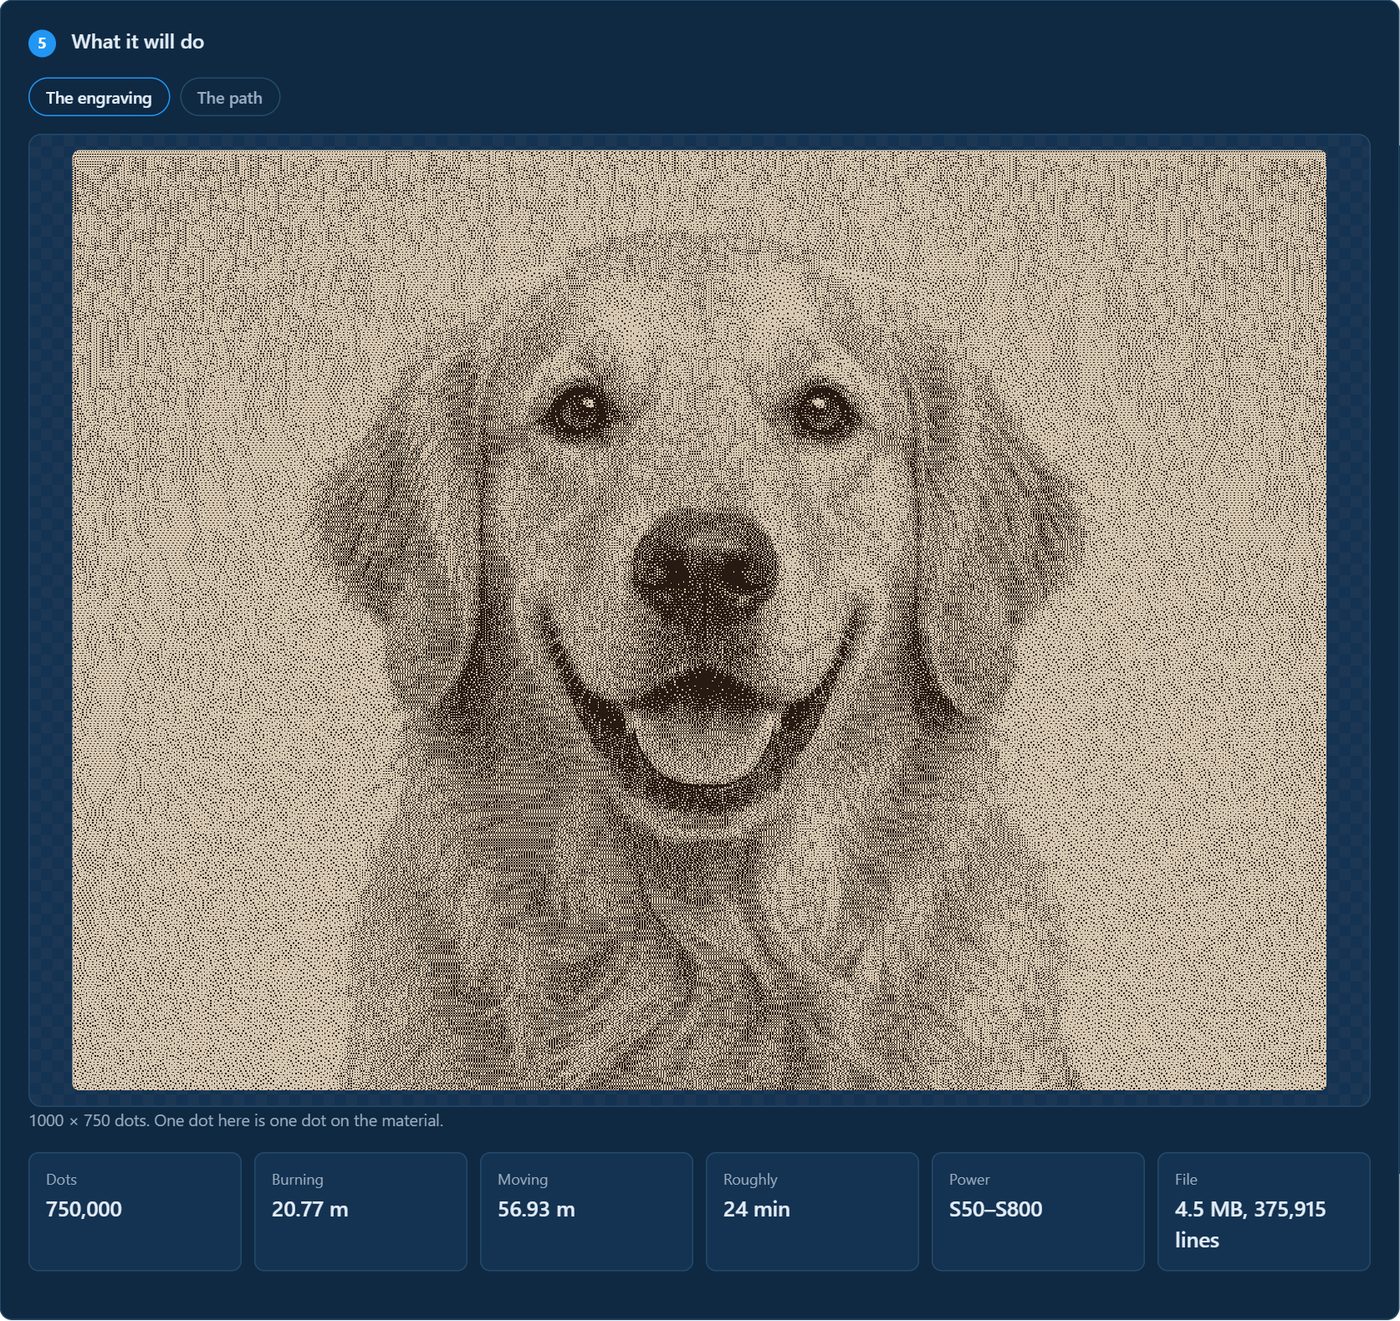
Drop a photo (JPG or PNG) on the page, or press browse. Then work down the steps; the preview follows every change.
How it should look
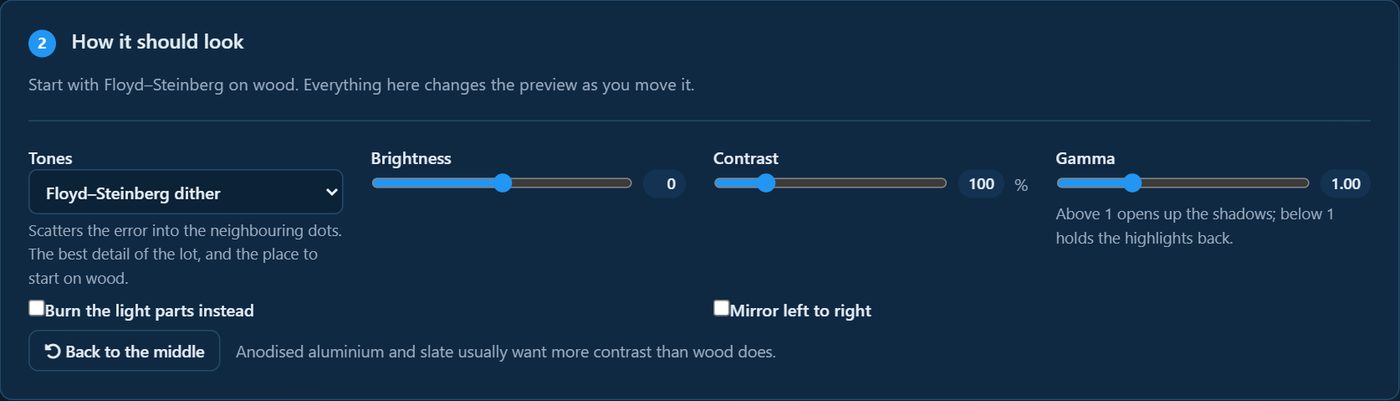
| Tones | When to use it |
|---|---|
| Floyd–Steinberg dither | The best detail. The place to start on wood. |
| Atkinson dither | Leaves the highlights properly empty. Kinder on anodised aluminium and pale wood, for a little less contrast. |
| Ordered dither (8 × 8) | A repeating cross-hatch. Every dot lands beside another, which suits a machine with slack belts. |
| Black or white only | No tones: line art, text and stencils. The cut-off sets where black starts. |
| Vary the power (greyscale) | For a machine that shades well with power. Fewer power steps make a smaller file. |
Brightness, contrast and gamma change the picture before it is turned into dots. Gamma above 1 opens up the shadows. Burn the light parts instead is for dark materials such as slate or anodised aluminium. Mirror left to right is for engraving the back of glass or acrylic.
Size, and how fine
- Width and height on the material, in mm.
- Line spacing: how far the head steps between sweeps. 0.10 mm is a good start. This is what decides how long the job takes.
- Dots along the line: how often the power may change along a sweep. No finer than your beam is wide.
The path
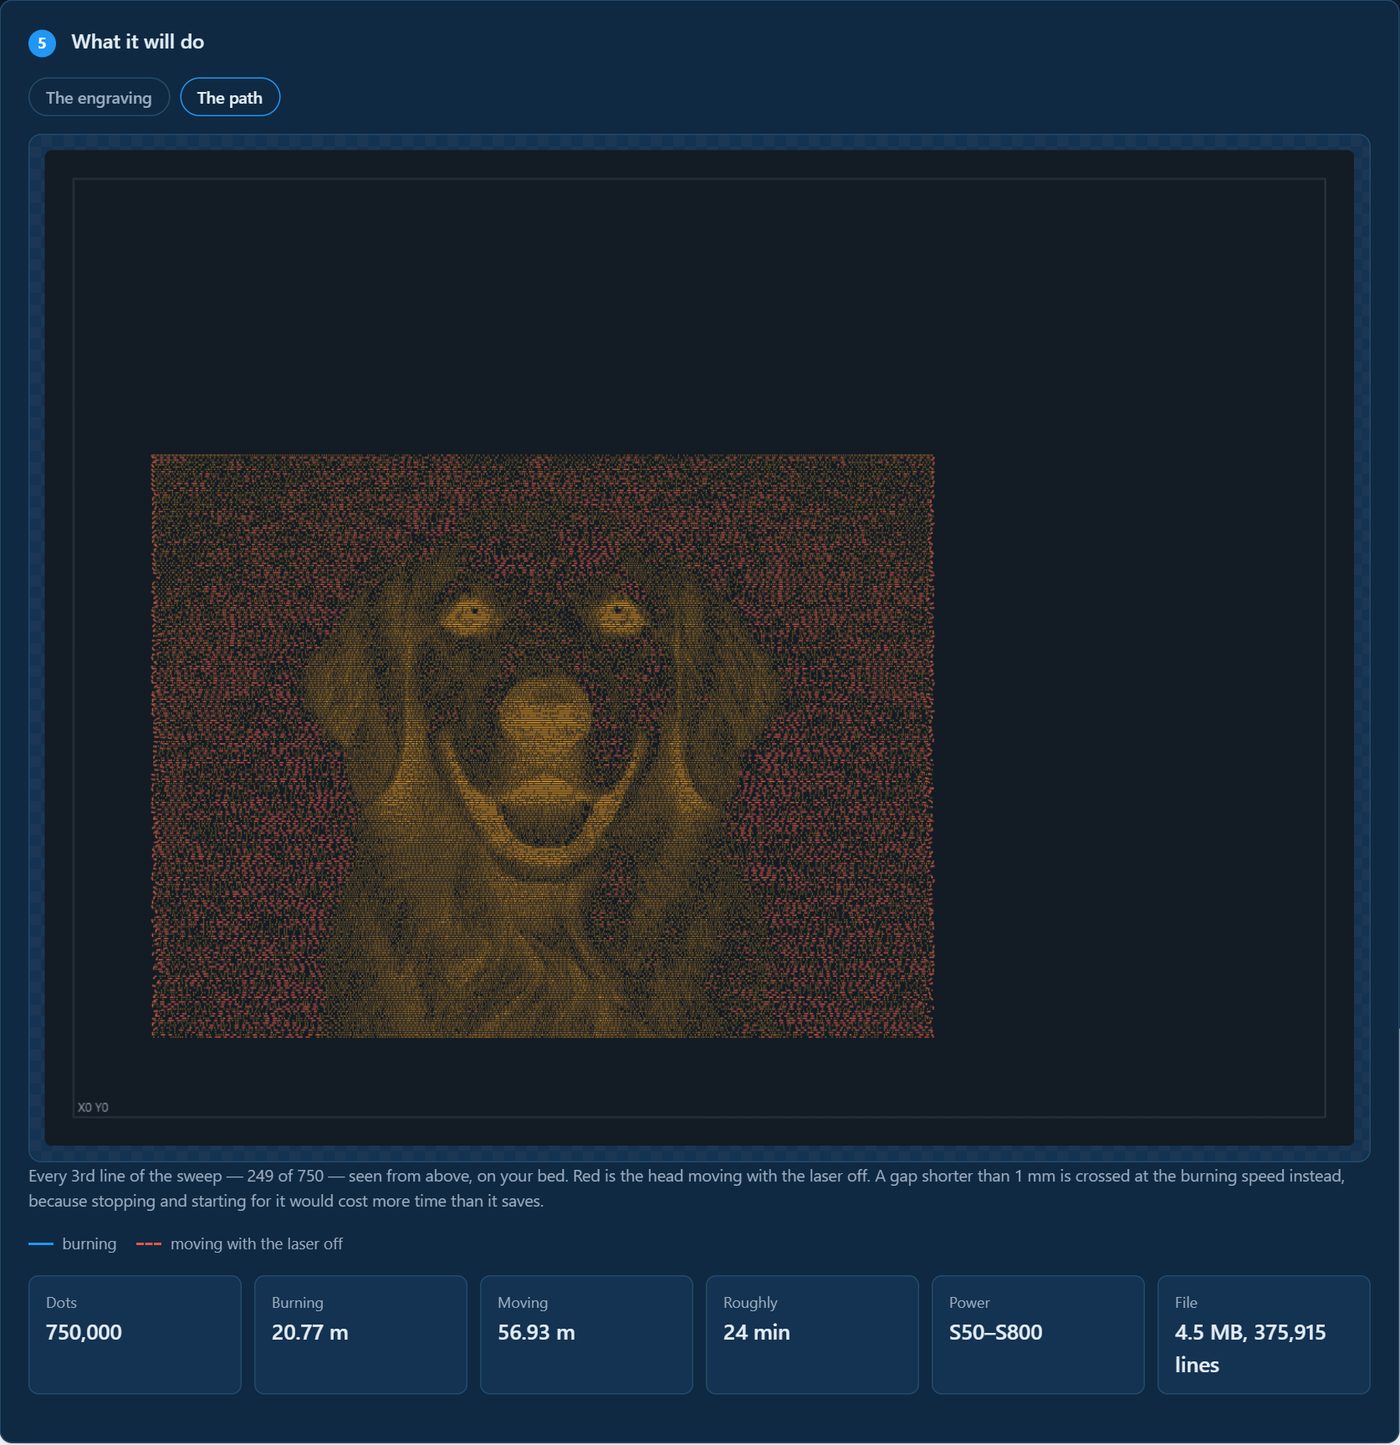
The path shows the sweeps from above, on your bed. The figures under it give the burning and moving distance, roughly how long it takes, the powers used and the file size.

Download the G-code saves a .nc file. Watch it run
opens it in the simulator; Look at the first lines shows the top of the file, with every
setting written in as a comment.
5Cutting and scoring a drawing
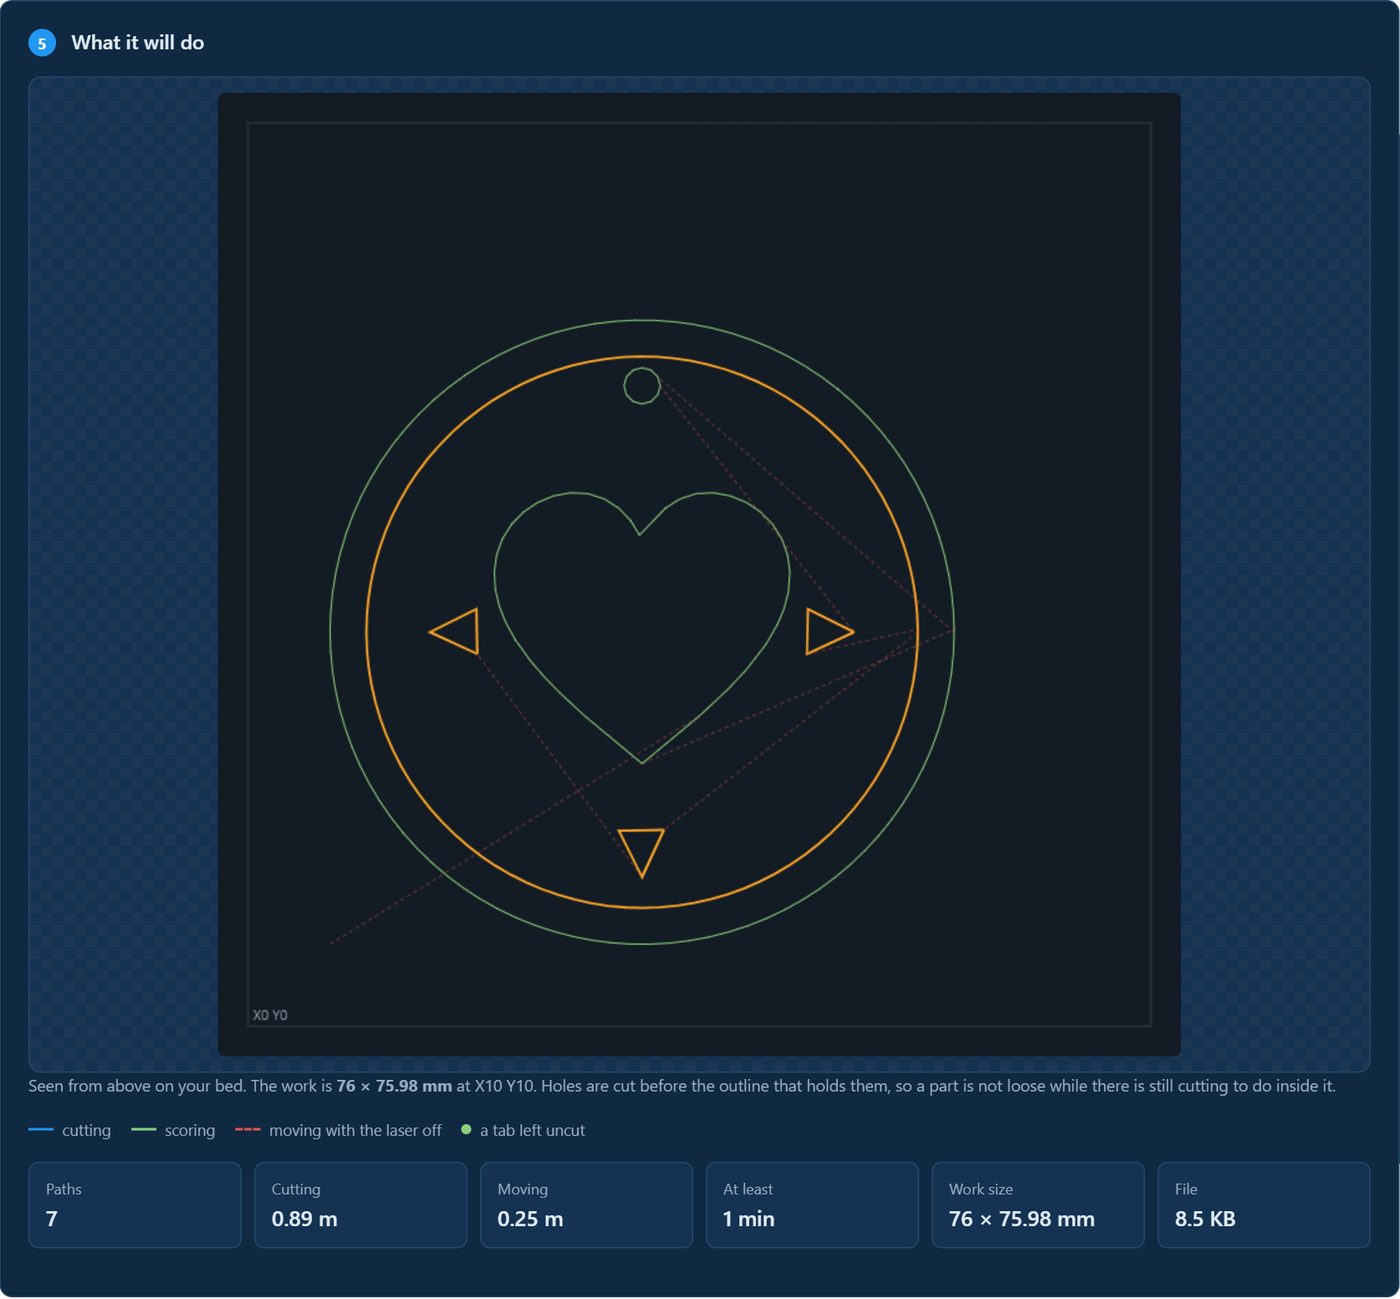
Drop an SVG drawing, or a PNG or JPG picture. An SVG is used as drawn. A picture is traced to outlines first: move the sliders (where the edge is, smoothing, straighten, ignore specks) until the outlines follow what you meant to cut. Save the trace as SVG lets you tidy it in a drawing program and bring it back.
Size and where it goes
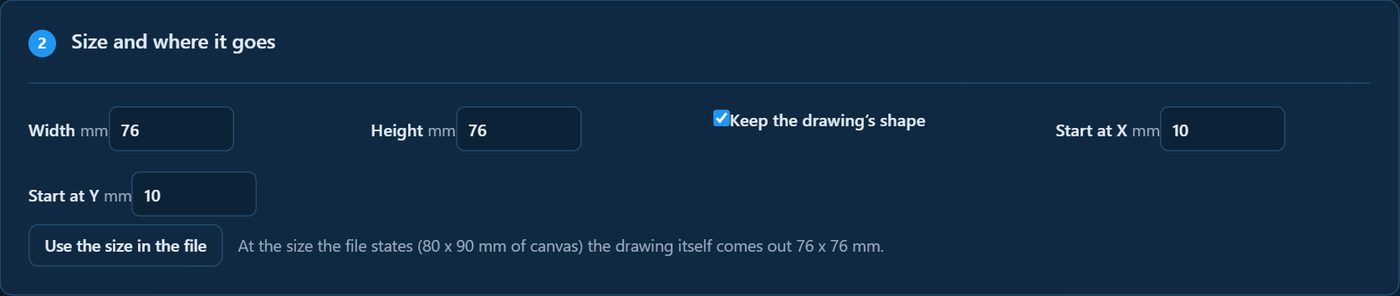
Set the width or height (the shape is kept), and where the work starts on the bed. Use the size in the file takes the size the drawing program saved.
What each colour does
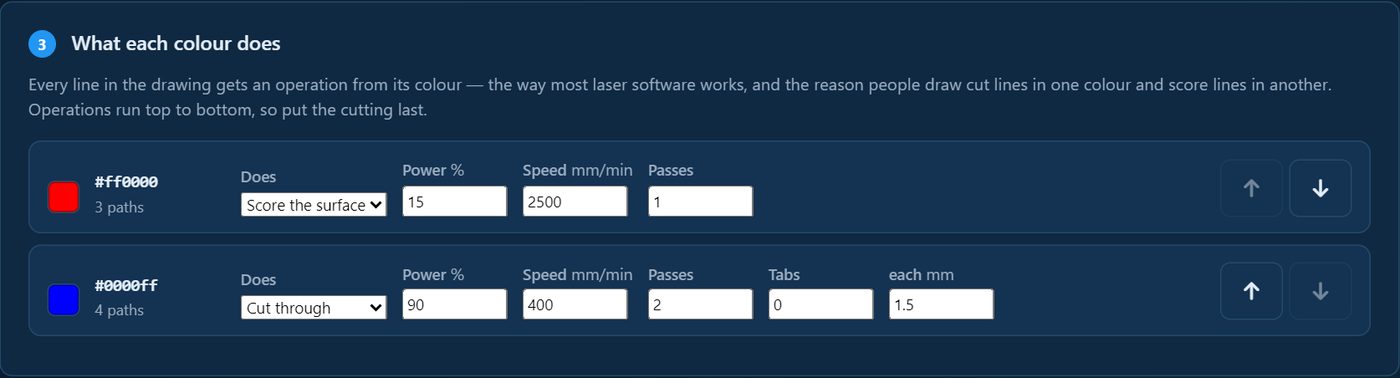
Every line gets its job from its colour, the way most laser software works. For each colour choose Cut through or Score the surface, with its power, speed and passes, and tabs for a cut. The rows run from the top down, so put the cutting last with the arrows.
Kerf: the part comes out the size you drew
The beam burns away a thin line, the kerf. Set it under Your machine, and choose which side of the line the beam runs: the shape (cut outside the line) or the hole (cut inside it). To measure your kerf, cut a 20 mm square and measure it: the difference is your kerf.
- Holes are cut before the outline that holds them, so a part is never loose while there is still cutting to do inside it.
- Tabs leave tiny uncut bridges so nothing drops out mid-job (a dot marks each one in the preview).
Getting a cut to go through
- Several quicker passes beat one very slow one: a crawl chars the edge and widens it.
- Air assist is not optional for cutting: it blows the smoke and the flame out of the cut.
- Cuts use
M3, constant power, so the corners do not lose power and stop going through.
6The laser designer: fill, line and cut layers
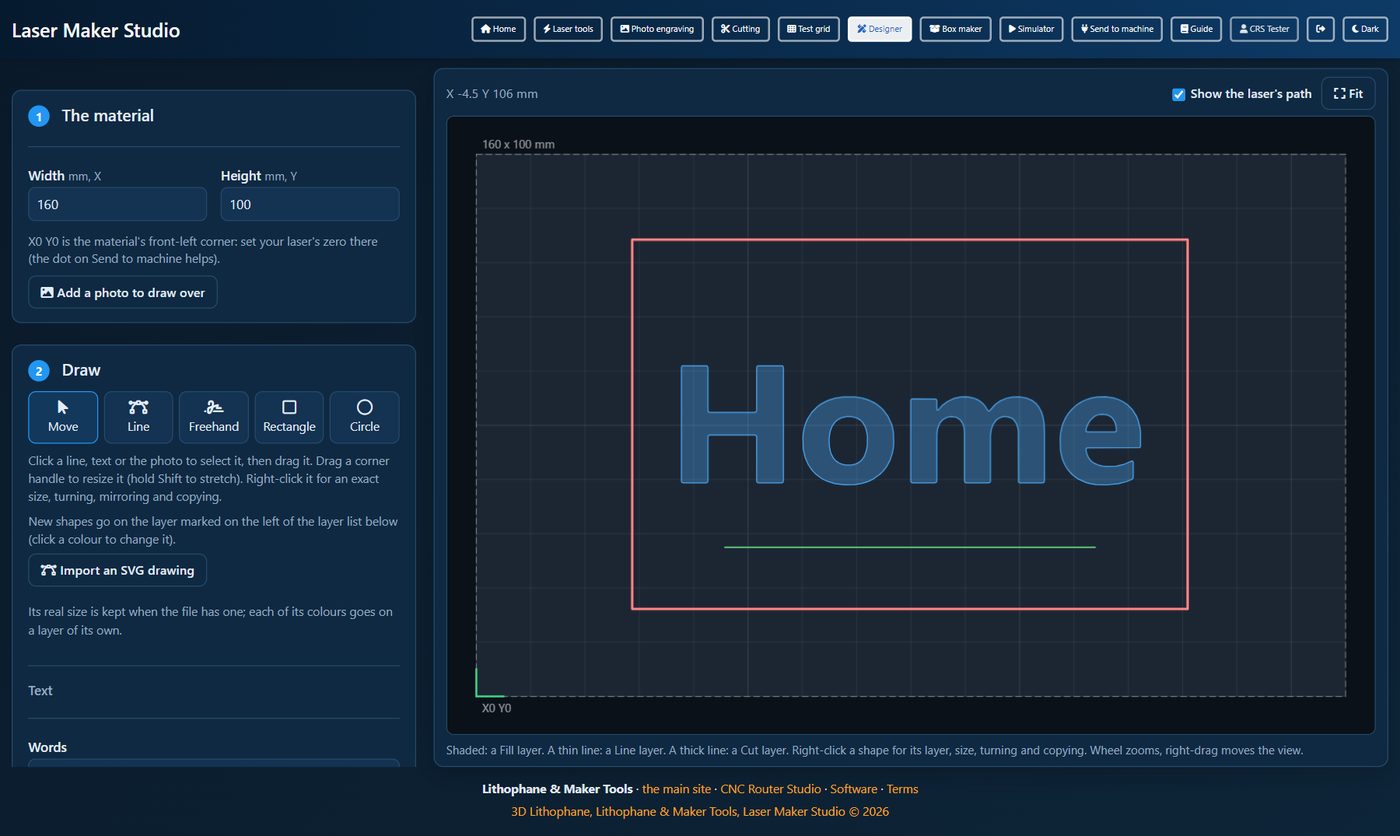
Draw your own design and burn it in one go, with each colour doing its own job, the way LightBurn does it.
Draw
- The material: its width and height. X0 Y0 is its front-left corner.
- Tools: Move, Line (point by point), Freehand, Rectangle and Circle. Drag a corner to resize; hold Shift to stretch.
- Text: type the words, pick a face and a letter height, and press Add the text. The letters become outlines, holes and all.
- An SVG: Import an SVG drawing. Its real size is kept when the file has one, and each of its colours goes on a layer of its own.
- A photo to draw over, or to trace into outlines. It is never burned itself (that is Photo engraving).
Layers
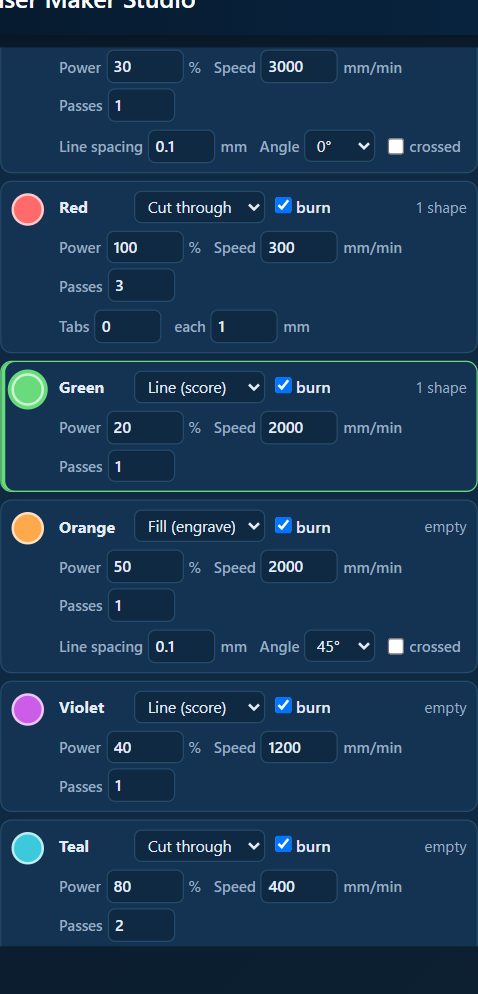
Click a colour to draw new shapes on it. Right-click a shape to move it to another layer, or to size, turn, mirror or copy it.
| Job | What it burns |
|---|---|
| Fill (engrave) | The inside of the shapes, in lines: the line spacing (0.1 mm is a good start) and their angle; crossed burns a second set across. A hole in a letter stays clear. M4, so the ends of the lines are not darker. |
| Line (score) | The outline, on the surface. A light power, for marks and fold lines. |
| Cut | Through the material: the passes, the kerf (on Your laser), and tabs if you want them. Holes are cut before the part around them. |
The file runs every fill first, then the lines, then the cuts, so nothing is cut free before it is engraved. Untick burn to leave a layer out. Your design is kept in this browser.
7The box maker
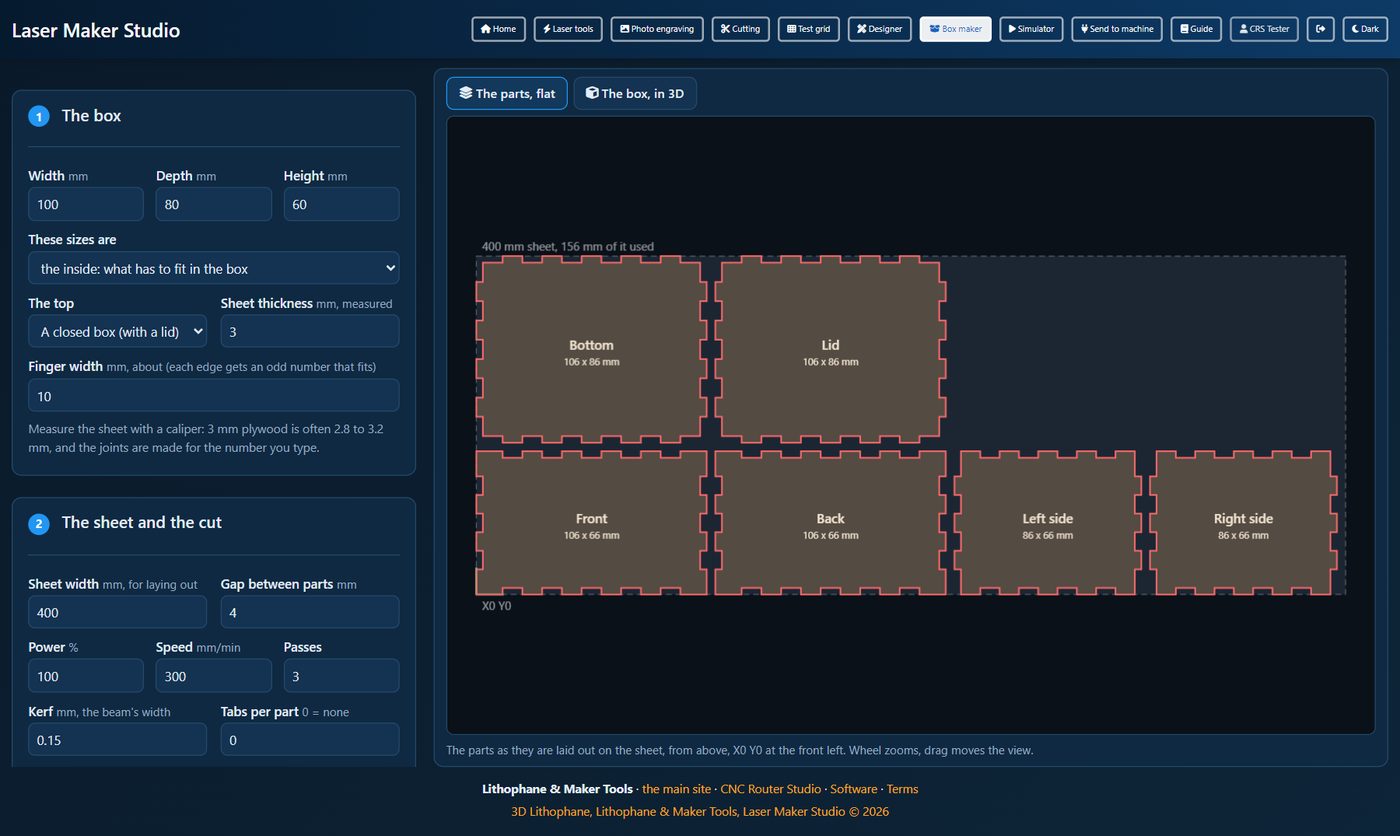
A box with finger joints, made to measure: type the size and your sheet's thickness, and the parts come out ready to cut.
- The size: width, depth and height, as the inside (what has to fit in it) or the outside.
- A closed box (six parts) or open at the top (five).
- Sheet thickness: measure it with a caliper. 3 mm plywood is often 2.8 to 3.2 mm, and the joints are made for the number you type.
- Finger width: about how wide each finger is; each edge gets an odd number that fits it exactly.
- Kerf: the fingers are made that much wider so the joints are tight. Too tight to go together: lower it. Loose: raise it.
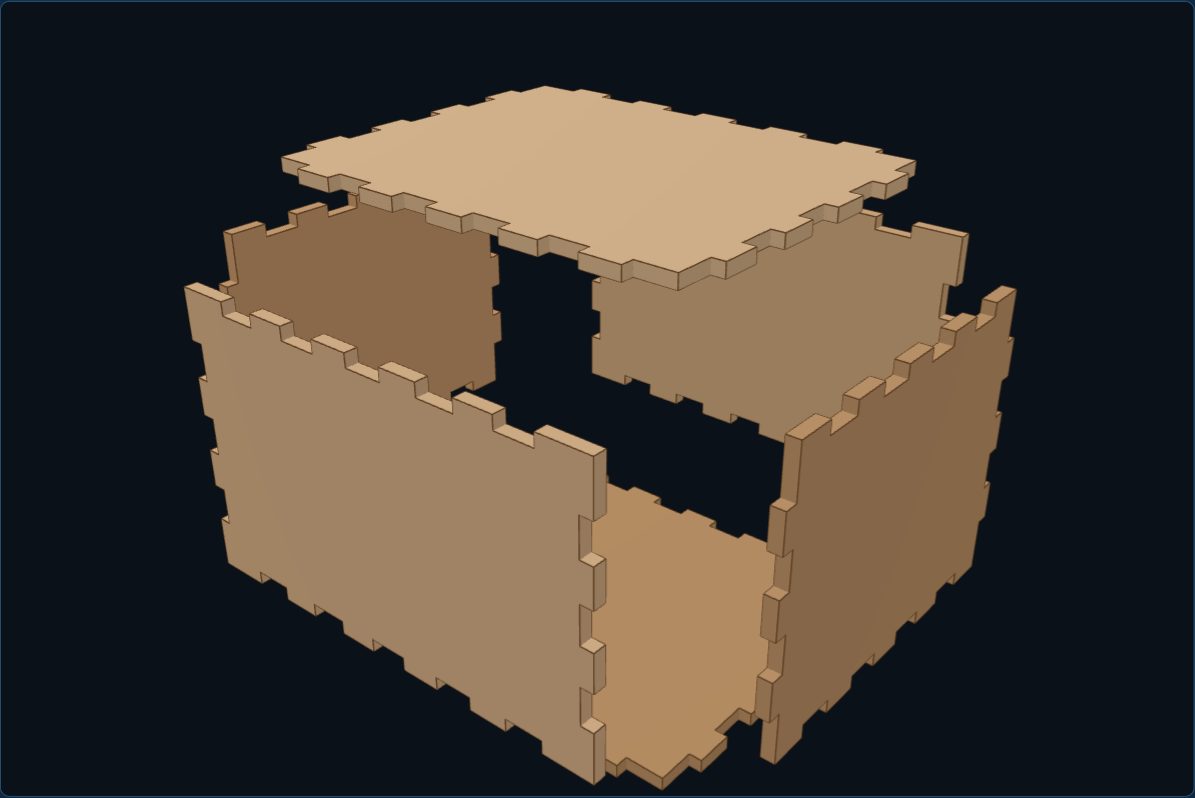
The box, in 3D shows it put together; drag to turn it, and Pull apart spreads the parts. Then download the G-code, send it to the machine, download an SVG (without the kerf, for LightBurn and the like), or open it in the designer to engrave a name or a pattern on the parts before they are cut.
8Your machine, and framing the job
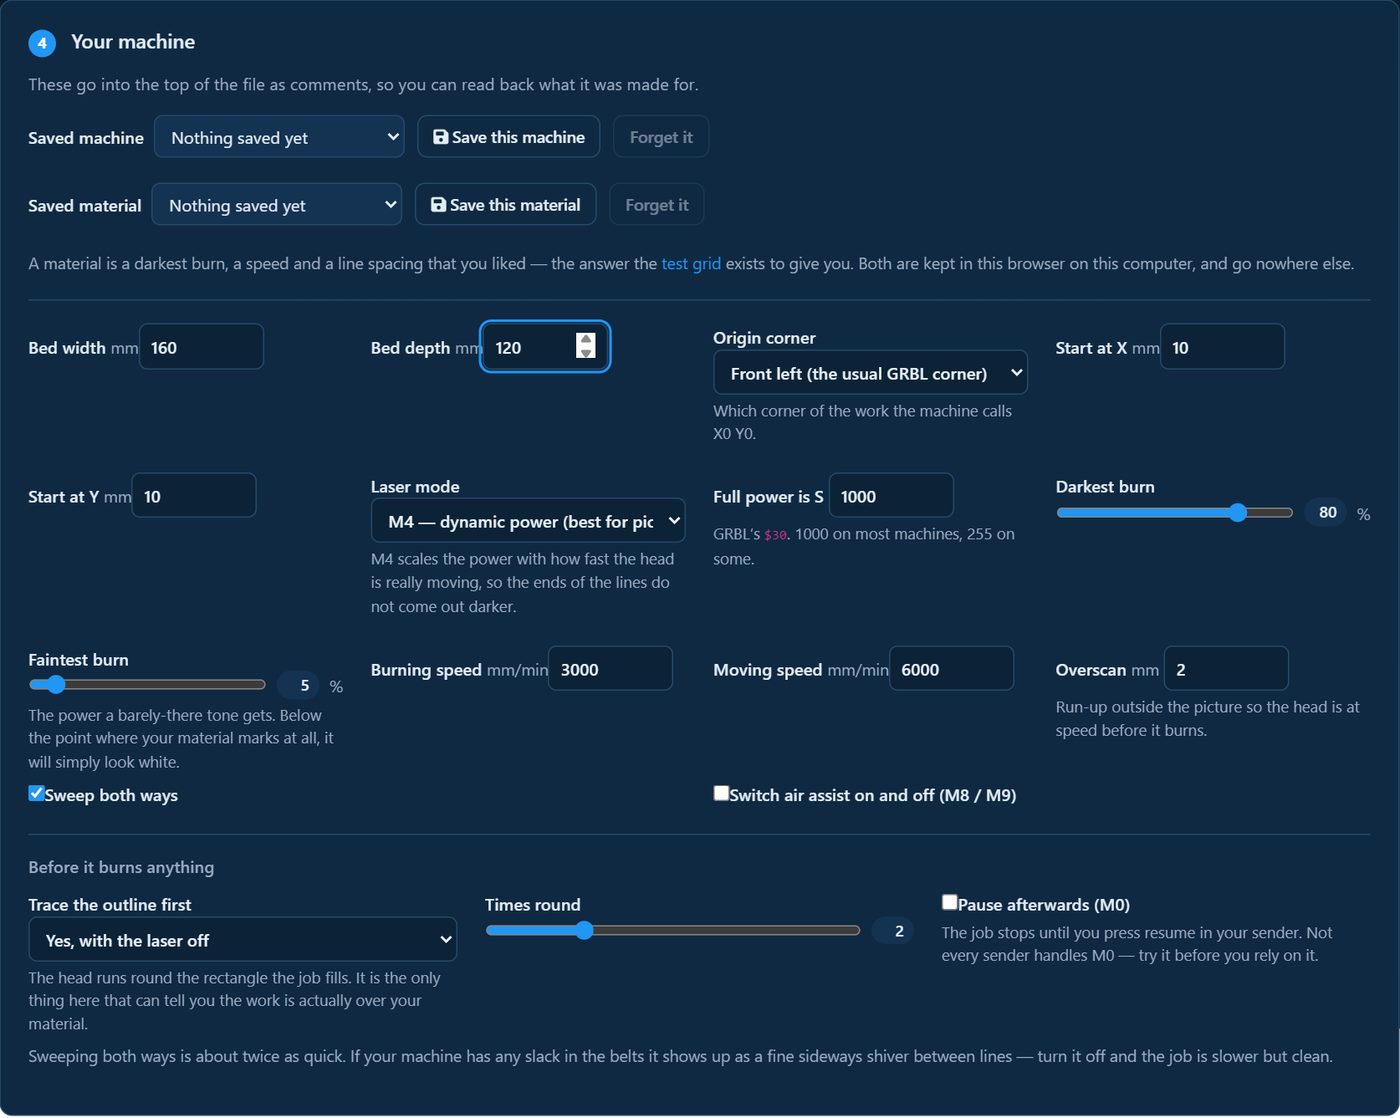
| Setting | What it is |
|---|---|
| Bed width and depth | How far your laser can move, in mm. |
| Origin corner | Which corner of the work the machine calls X0 Y0. Front left is the usual GRBL corner. It decides which way round the work is laid down, so it reads the right way from the front. |
| Start at X, Y | Where the work starts from that corner. |
| Laser mode | M4, dynamic power, for pictures: the ends of the lines do not come out darker.
M3, constant power, for cuts and the test grid. |
| Full power is S | The S number that means full power: GRBL's $30, usually 1000. |
| Darkest and faintest burn | The power range a picture uses, in %. Read them off your test grid. |
| Burning and moving speed | In mm/min. |
| Overscan | A run-up outside the picture so the head is at speed before it burns. |
| Sweep both ways | Faster. Turn it off if the lines do not line up. |
| Air assist | Switches it on and off in the file (M8 / M9). |
Save this machine keeps it in this browser for next time, and a material keeps its power, speed and line spacing.
Trace the outline first
Before anything burns, the head runs round the rectangle the job fills: with the laser off, or at a low power so it marks faintly. Choose how many times round, and Pause afterwards to stop until you resume in your sender, so you can move the material. It is the only check that the work is really over your material.
9The simulator
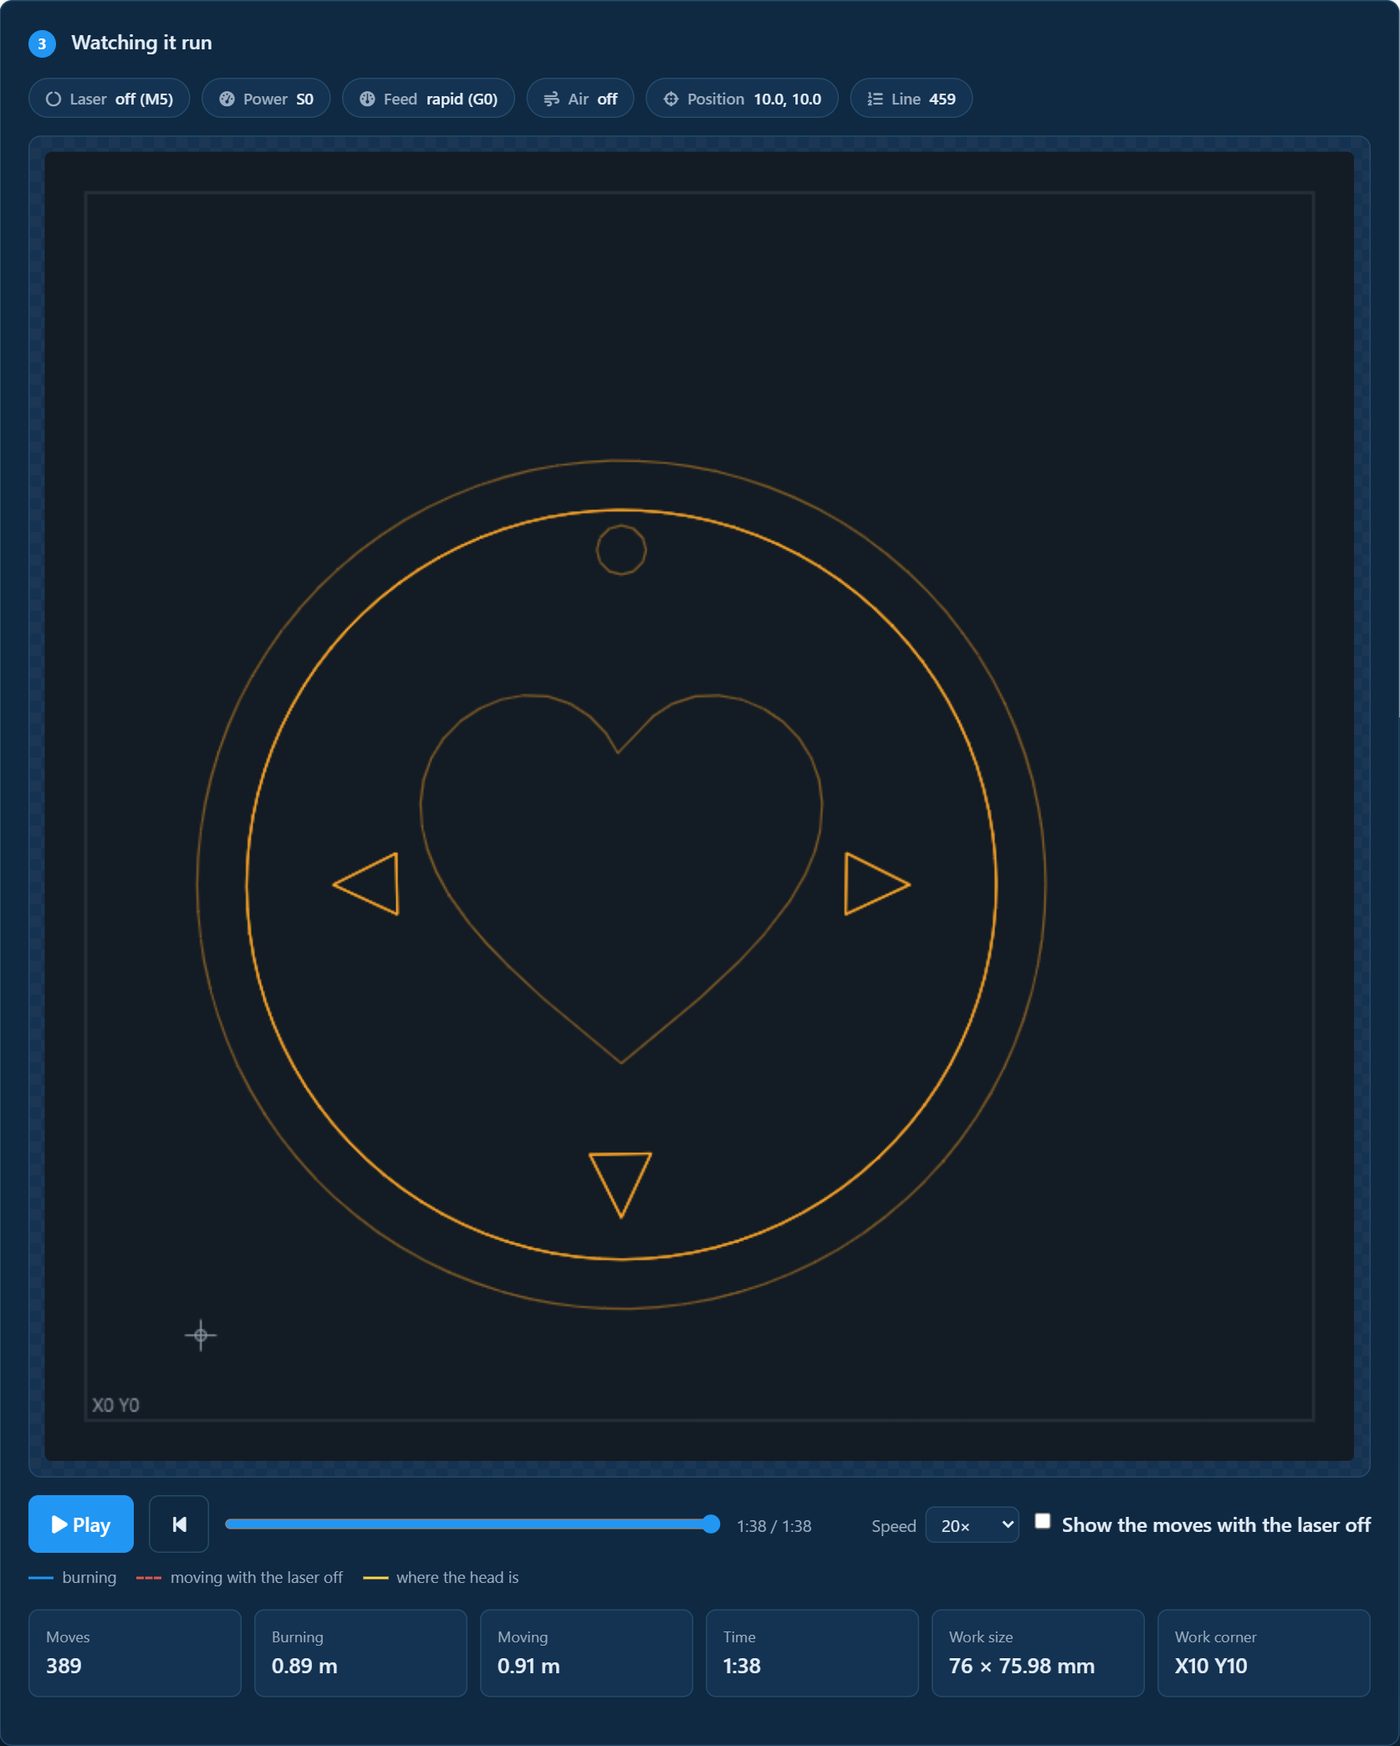
Watch a file run before the machine does. It reads the finished file, not the plan that made it, so it can catch the writer out, and it takes any GRBL file, from LightBurn or anywhere else.
- The file: drop a G-code file, or press Watch it run on any tool (or the link on Send to machine).
- Your machine: the bed, and the acceleration (
$120) and fast move rate ($110), so the time it shows is the real one. - Watching it run: Play, the slider to go anywhere in the file, and the speed (1× is real time and the start; 2× to 50×, and 100× or 1000× for a long photo engraving). The head moves along each line with the burn growing behind it, and Pause holds it where it is. The chips above show the laser, power, feed, air and position as it goes.

What it found lists anything worth a look: the laser left on during a fast move, a job that runs off the bed or into negative coordinates, a pause partway through, or a file that does not switch the laser off at the end.
Running it on your laser
10Send to machine: connect, set up, the dot
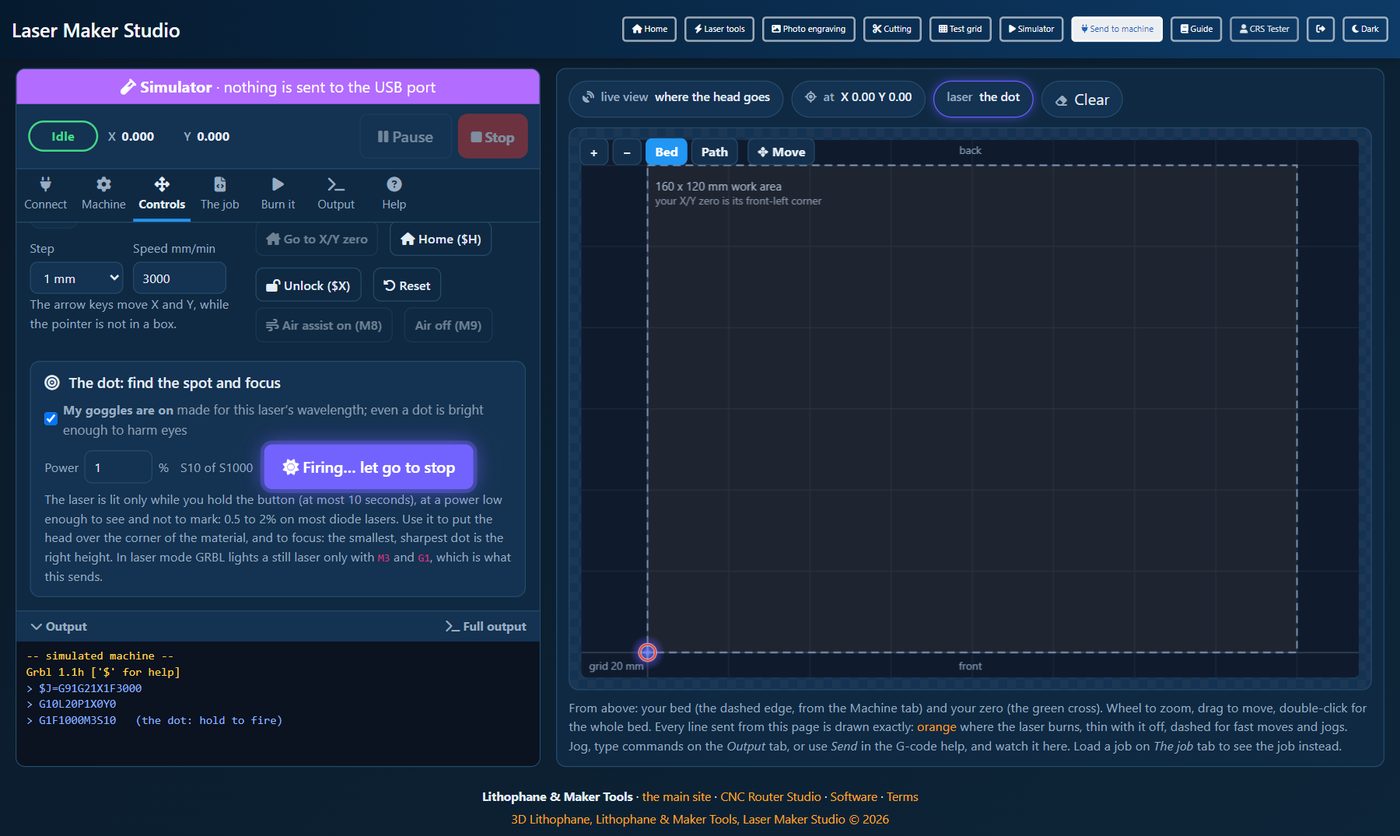
Run the job on your laser from the browser, with nothing to install. It needs Chrome or Edge on a computer (only they can talk to a USB port). Open it from the menu, or press Send to machine on the engraving, cutting or test grid page: the job comes with you.
Connect
- Plug the laser in by USB and switch it on. Close LightBurn or LaserGRBL, or the port is busy.
- Choose Live machine, leave the speed at 115200, and press Connect the machine.
- Pick the laser in the list of ports (often USB Serial, CH340 or Arduino).
The Machine tab (once)
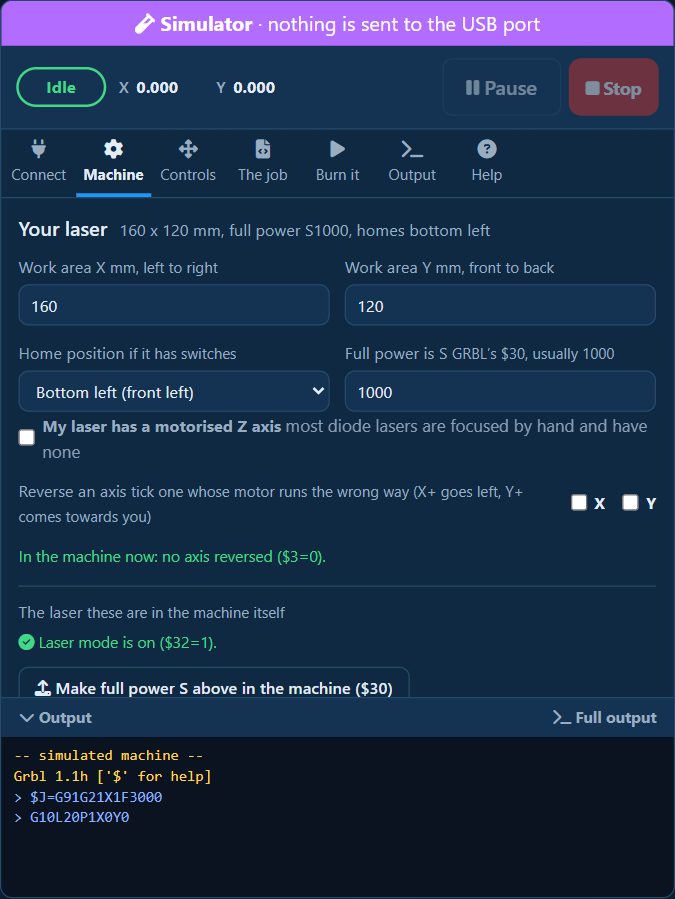
- Work area and the home corner, and whether the laser has a motorised Z (most diode lasers do not: then there is no Z anywhere on the page).
- Full power is S: 1000 on most GRBL lasers, the machine's
$30. The page compares the job's powers with it. - Laser mode (
$32): the tab says whether it is on in the machine. If it is off, press Switch laser mode on: without it the head stops at every change of power and a picture burns as dark dots. - Limit switches: not fitted (the safe default) keeps X and Y between your zero and the work area; fitted means home it first. Reversed axes and the switch settings go into the machine itself.
Controls: move it, the zero, and the dot
- Jog with the arrows (or the arrow keys), in steps of 0.1 to 50 mm.
- The dot: tick My goggles are on, then hold Hold to fire the dot. The laser lights at a very low power (1% to start) only while you hold it, for at most 10 seconds. Use it to see exactly where the beam is, and to focus: the smallest, sharpest dot is the right height.
- Move the dot to the front-left corner of your material and press X and Y zero here: files made here start from that corner.
- Air assist on / off switch it by hand
(
M8/M9). - Without limit switches X and Y stay between your zero and the work area. To move the head below X0 or Y0 by hand, tick Let me move below X0 and Y0: the jog buttons, the arrow keys and Move can then go there, while a job still never does. The tick is off again each time the page is opened.
All the settings: the Settings tab
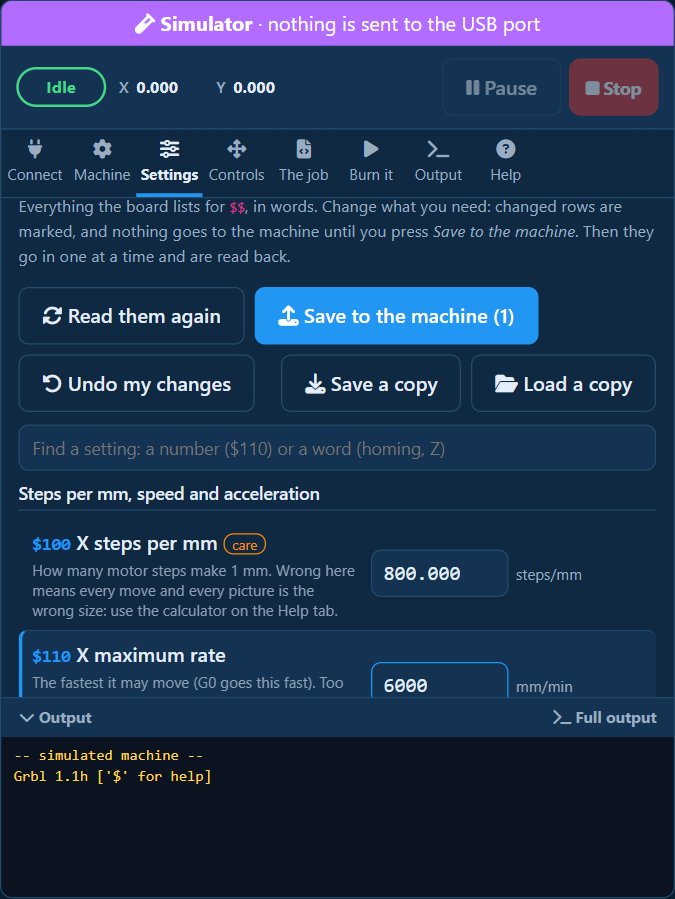
The Settings tab shows everything the connected board lists for $$, grouped and in words:
steps per mm, speeds and acceleration for each axis, travel and limits, homing, laser power ($30 full
power, $31 lowest power, $32 laser mode), the step signals and the reports. Each one says
what it does and its unit; the ones that change how the machine moves are marked care.
- Change what you need: type a number, or tick a box. A changed row is marked and shows what the machine has now. A value that will not do (a letter, or too small) is shown in red and cannot be saved.
- Press Save to the machine. It lists the changes and warns about the risky ones (steps per mm, a reversed axis, homing with no switches, laser mode switched off). Then they go in one at a time and are read back, and it says which ones the machine took.
- Undo my changes puts the boxes back as the machine has them.
Type in Find a setting to narrow the list: a number such as $110, or a word such as
homing. Save a copy keeps every setting in a text file, and
Load a copy fills the boxes from one; nothing is sent until you press Save. On GRBL 0.9
there is no $30 to $32.
The stepper calculator
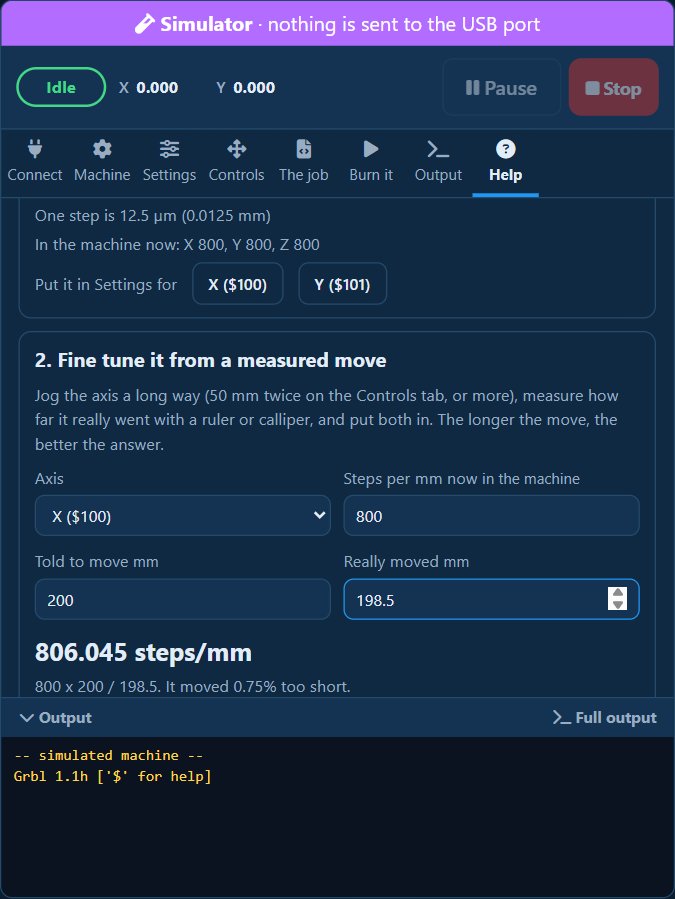
At the bottom of the Help tab. Four parts:
- Steps per mm from the parts: the motor (200 steps a turn for most), the microstepping set on the driver, and the drive: a belt and pulley (most lasers: a GT2 belt on a 20 tooth pulley with 16 microsteps is 80 steps per mm), a lead screw, or a rack and pinion.
- Fine tune from a measured move: jog an axis a long way, measure how far it really went, and it works out the right steps per mm.
- How fast the motor turns at a speed you choose. Above about 600 to 1000 rpm most steppers lose their pull and skip steps, and a picture shifts.
- Driver current (Vref): the voltage to set on an A4988, DRV8825 or TMC2208/2209 driver for your motor's current.
Put it in Settings fills that axis on the Settings tab; press Save to the machine there to store it.
11The job, framing and burning
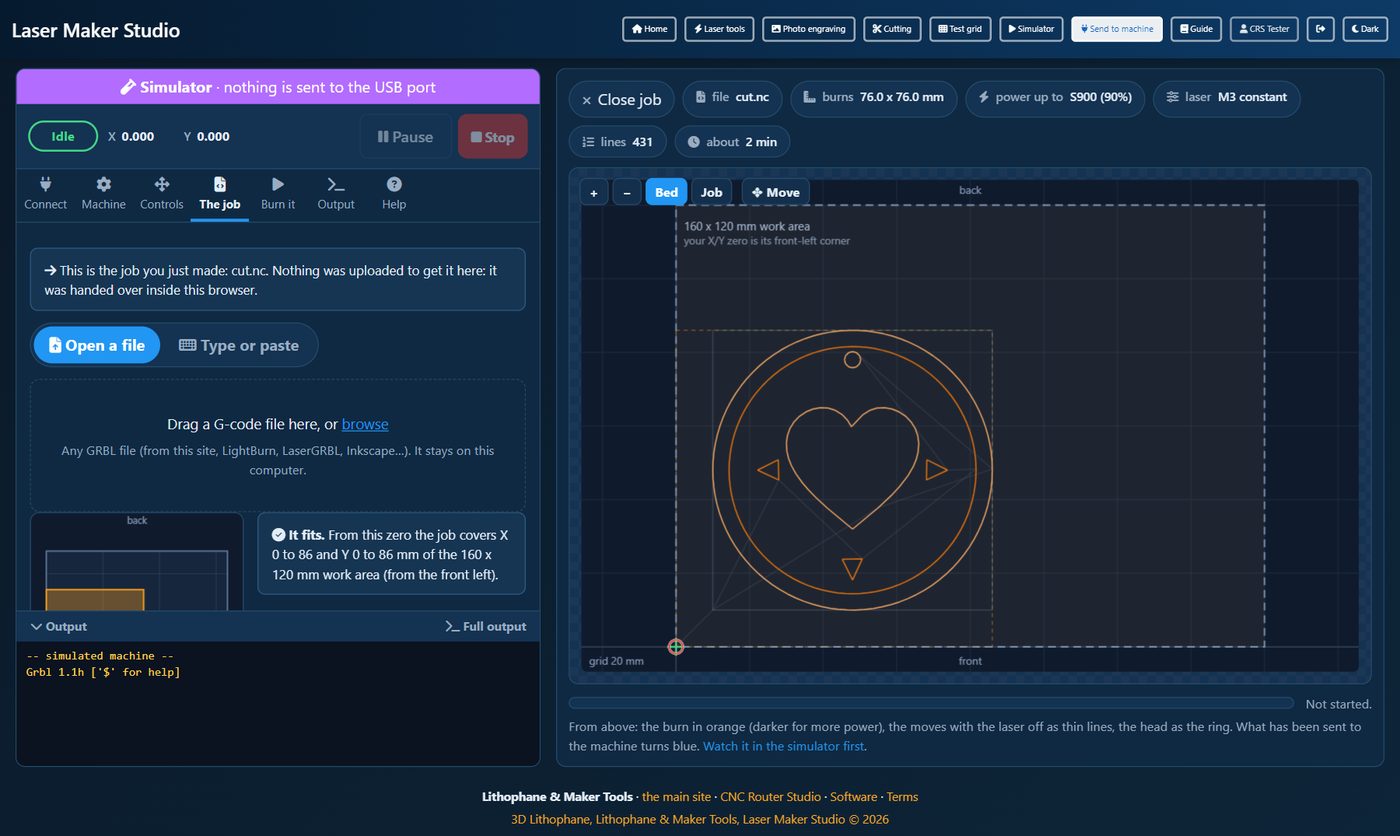
A job handed over from a tool is already loaded. Otherwise, on The job, open a G-code file (any GRBL file, from this
site, LightBurn, LaserGRBL…) or type and paste one. Along the top: how big the burn is, the highest power, the laser
mode (M4 for pictures, M3 for cuts), the lines and the time.
- Worth a look: the page says if a file never lights the laser, asks for more power than full power on this machine, looks made for a machine where full power is S255, leaves the laser on through a fast move, or never turns it off.
- It fits: where the job lands on your bed from your zero, and whether it stays inside the work area.
- Frame the job runs the head round where it burns: with the laser off (watch the head) or with the dot, which is easier to follow. Check it is all on the material.
Burn it
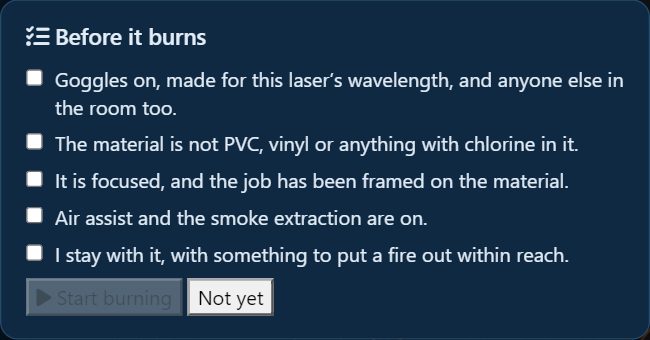
Press Start and tick the checklist: goggles, no PVC or vinyl, focused and framed, air and smoke extraction on, and someone staying with it. Then Start burning.
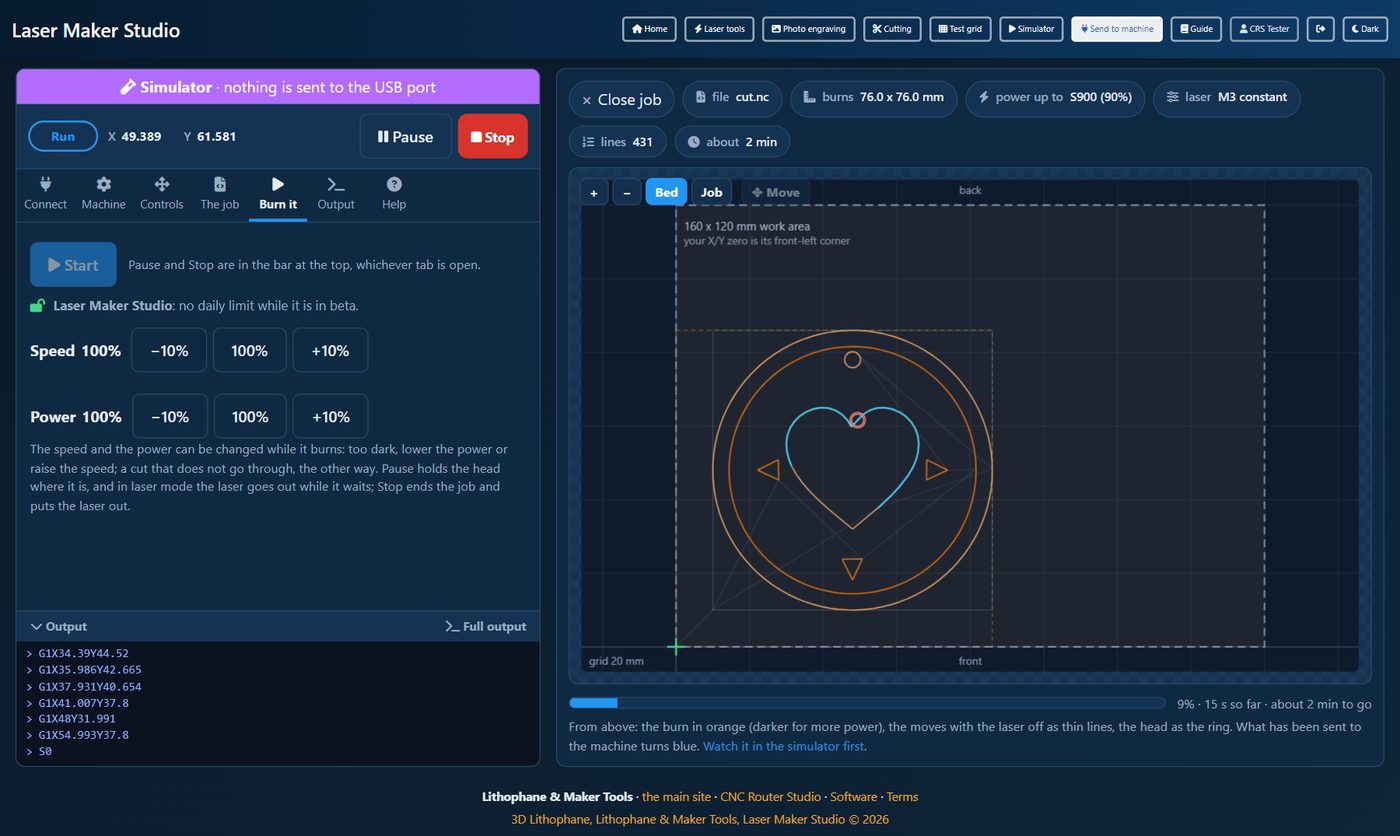
- Speed and Power change while it burns, 10% at a time: too dark, less power or more speed; a cut that does not go through, the other way.
- Pause (top bar, on every tab) holds the head; in laser mode the laser goes out while it waits. Stop ends the job and puts the laser out.
- A stop in the file (
M0) waits for you with the laser off: turn the material over or refocus, then carry on. - On the live laser, a free account has 2 jobs a day; the same job started again in the same visit is not counted twice. The Simulator is always free.
12Coming next
Being built now, in this order. This guide gets a chapter for each as it arrives.
- Kerf and focus tests next to the test grid, and starting settings for common materials.
- Rotary engraving for mugs and tumblers, and DXF files on the cutting page.
- The desktop app for Windows and Mac.
When something is wrong
13Problems and fixes
| What you see | What to do |
|---|---|
| The picture burns as dots and the machine stutters | GRBL's laser mode is off. Send $32=1 in your
sender. |
| Nothing burns, or everything is faint | Check Full power is S matches the machine's $30,
and the focus. Then burn a test grid. |
| The ends of each line are darker | Use M4 for pictures, and some overscan. |
| The lines do not line up | Turn off Sweep both ways, or slow down. |
| The work is mirrored or upside down | Check the origin corner is the one your machine uses. |
| A cut does not go through | More passes, focus, air assist; then a little more power or a little slower. |
| Parts come out the wrong size | Measure your kerf (a 20 mm square) and set it; check the kerf side. |
| Words are missing from a drawing | Turn the text into paths in your drawing program. |
| The file is very big | Use a coarser line spacing, or Black or white only for line art. |
| No port in the list (Send to machine) | Use Chrome or Edge on a computer. Check the cable and that the laser is on; close LightBurn or LaserGRBL. Some lasers need a CH340 driver installed. |
| Connects, then nothing | Check the speed is 115200, then press Reset. |
| Alarm | Press Unlock ($X). Home it if it may have lost its place. |
| The dot does not light | Tick My goggles are on, and raise its power a little (some lasers only light above 1 to 3%). The machine must be standing still (Idle). |
| "At its wall" | No limit switches: X and Y stay between your zero and the work area. Set the zero where the job starts, or choose Fitted if the laser has switches. |
| Today's free downloads are used up | They come back tomorrow, or unlock Laser Maker Studio for no limits. The test grid and the simulator are always free. |
| Today's free jobs on the live laser are used up | They come back tomorrow, or unlock Laser Maker Studio. The Simulator is always free. |
Still stuck? Write to support@3d-lithophane.com. Save on Send to machine's Output tab makes a file of everything the machine said: send it along.
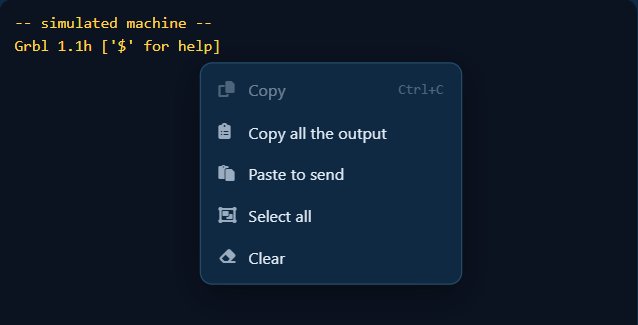
Right click on the output (on the Output tab or the strip under the other tabs) for Copy, Copy all the output, Paste to send, Select all and Clear. A pasted line waits in the command box for you to check and send; several lines are sent one at a time after you say yes.
14Quick reference
Keys on Send to machine
| Key | What it does |
|---|---|
| ← → ↑ ↓ | Jog X and Y one step |
| Esc | Stop Move; put the dot out |
| Ctrl+Enter | Use the G-code in the editor |
A few GRBL words
| Word | Meaning |
|---|---|
G0 / G1 | Move with the laser off / burn at the feed |
M3 | Laser on, constant power (cuts, the test grid) |
M4 | Laser on, power follows the speed (pictures) |
M5 | Laser off |
S | The power, 0 to $30 |
M8 / M9 | Air assist on / off |
M0 | Stop here until resumed |
$30 | The S value for full power |
$32=1 | Laser mode: no stop at every power change |
$110, $120 | Fast move rate and acceleration (X) |
$H / $X | Home / unlock after an alarm |
Laser Maker Studio · 3d-lithophane.com · October 2026